This guide will cover the process of configuring a requisition after it has been created in your RIVS account.
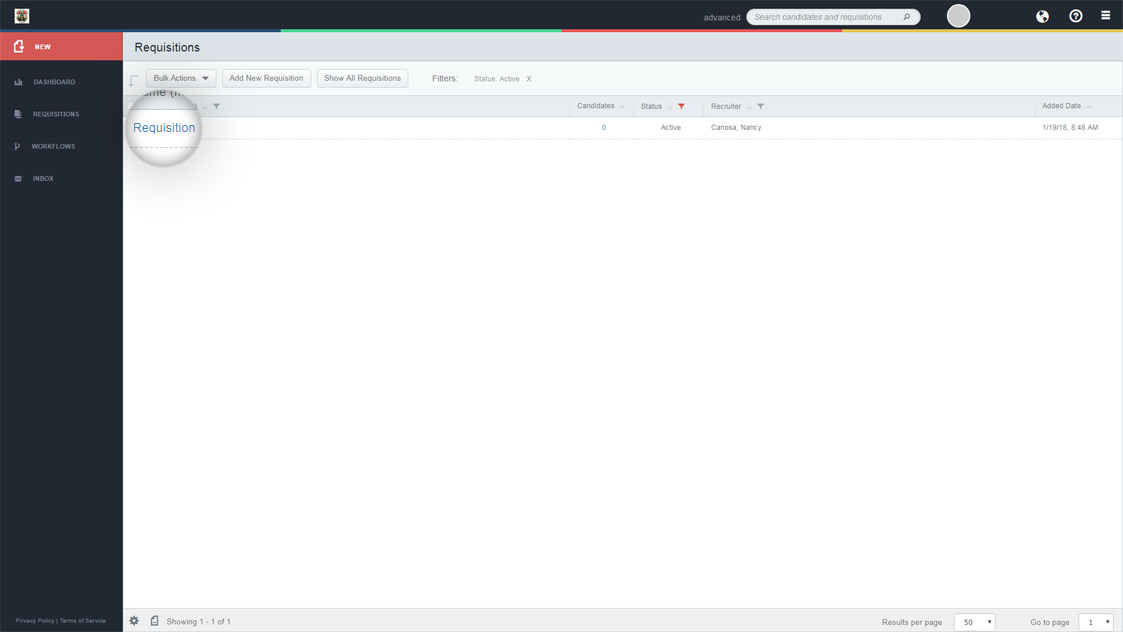
- From your dashboard, select the Requisitions Menu.
- Click on the Requisition you’d like to configure.
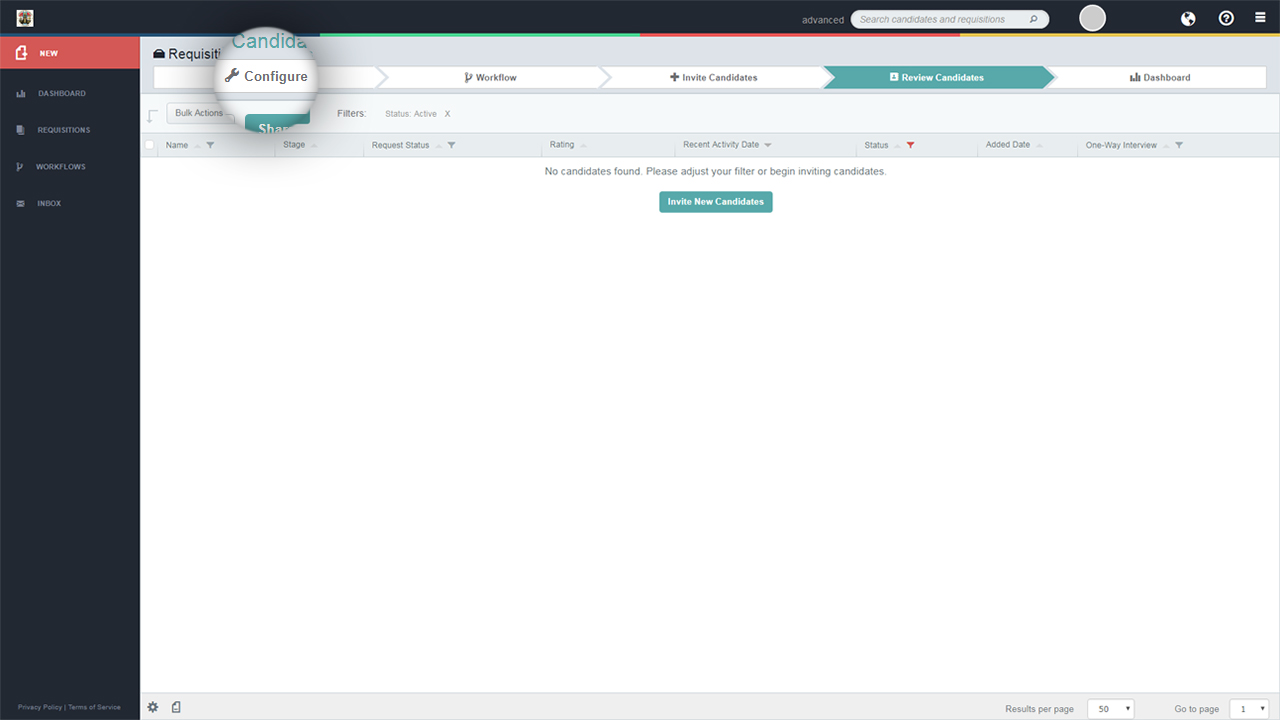
- Select the Configure tab.
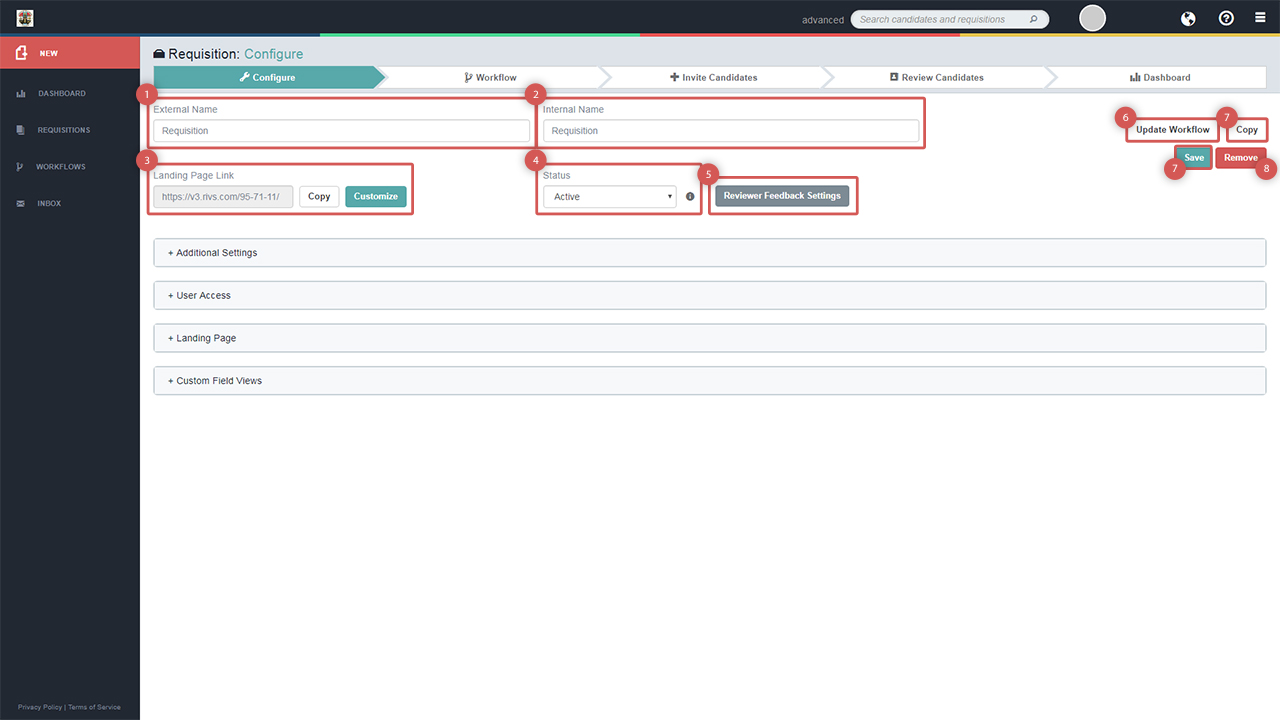
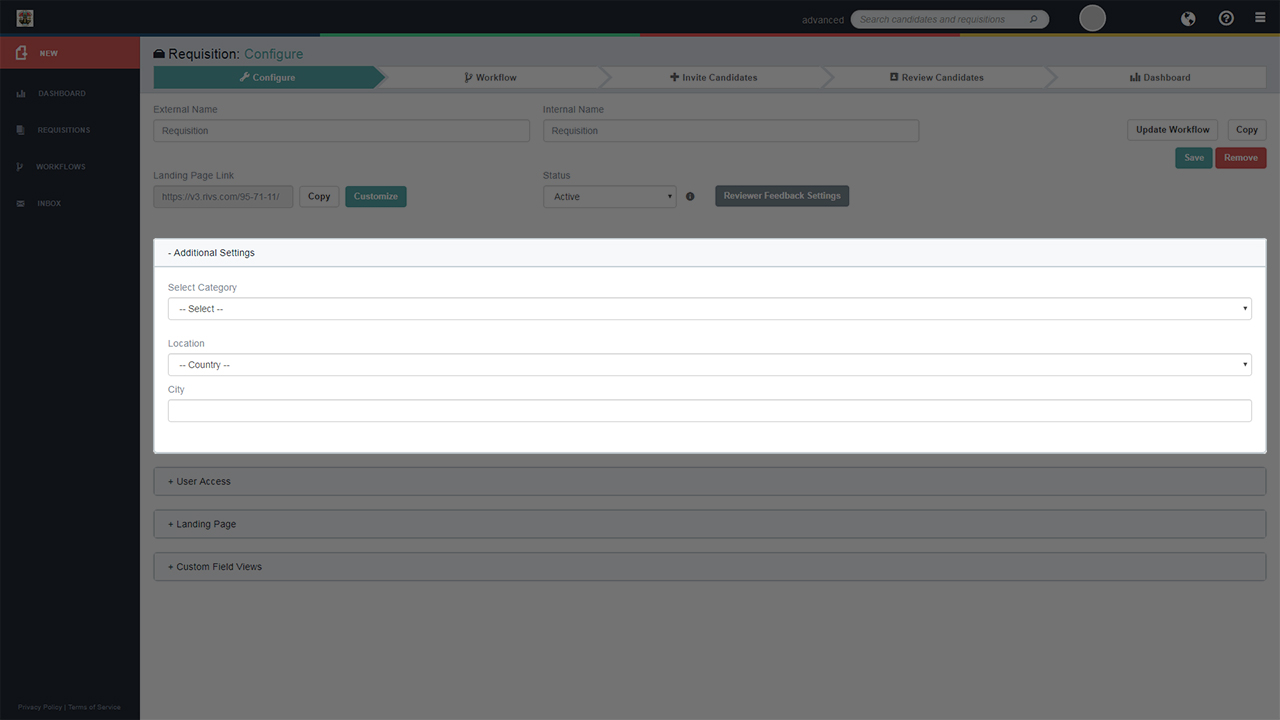
- In the top section of the page you have the option to:
- Edit the External Name, which is the name candidate will see.
- Editing the Internal Name, which is the name internal recruiters will see in RIVS.
- Copy or customize a landing page link which can be shared directly with candidates.
- Deactivate the Requisition.
- Configure Reviewer Feedback Settings.
- Update the Workflow, which will navigate the user to the Workflow tab allow you them to create and configure Workflow Stages.
- Copy the Requisition, which will create a copy of the selected Requisition in the Requisitions Menu.
- Save changes.
- Remove the Requisition.
- In the Additional Settings section, select a category, location, and city for the Requisition.
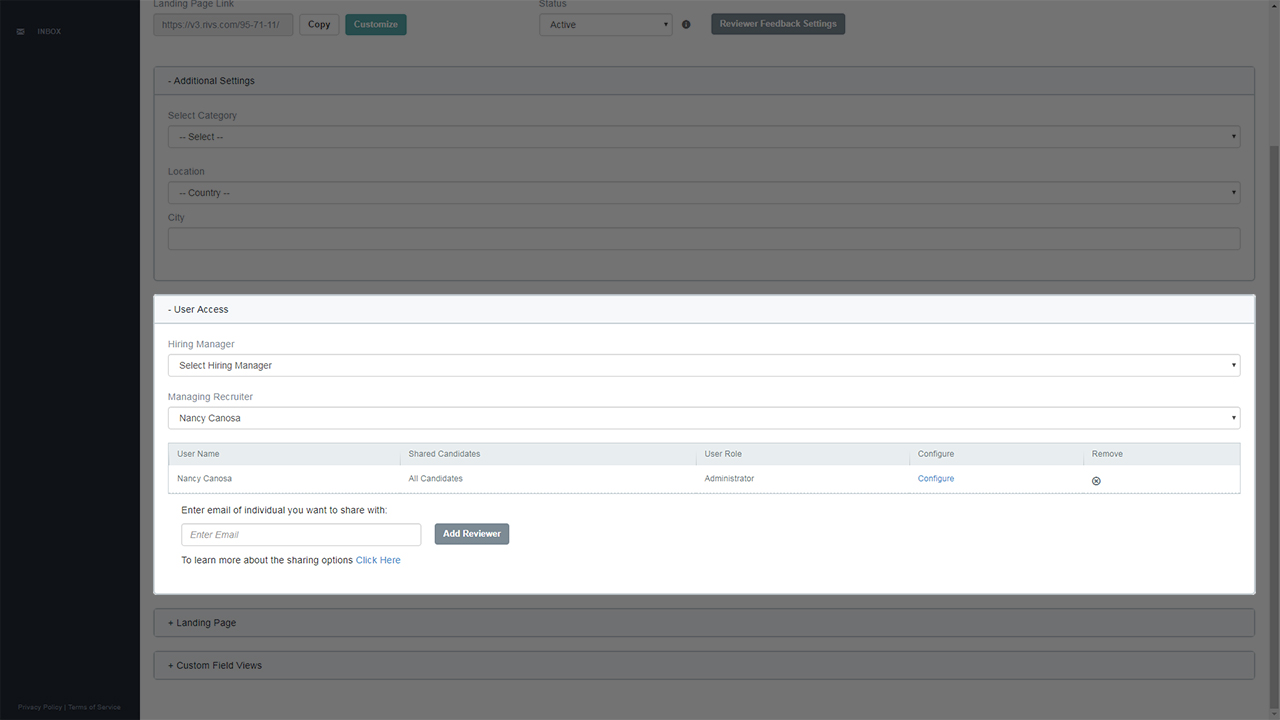
- In the User Access section, select a Hiring Manager, Managing Recruiter, configure user access to the requisition, and give access to internal and external users.
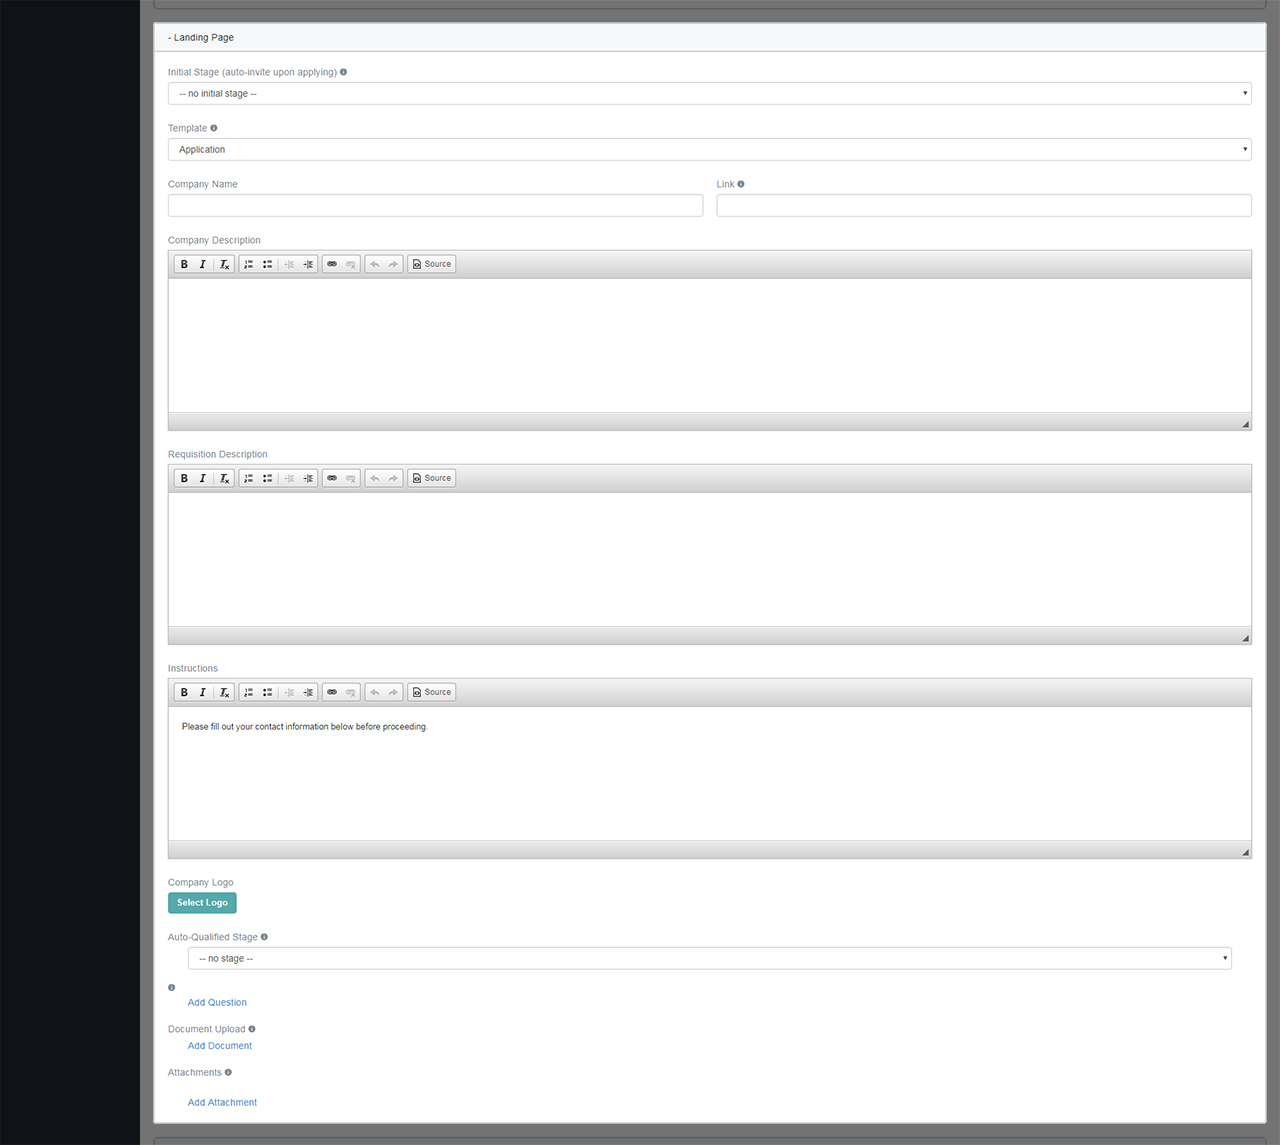
- In the Landing Page section, you can configure the following options:
- Initial Stage – which allows you to choose which stage new candidates are automatically invited to.
- Template – which will automatically adjust the style of the landing page.
- Company Name – add a company name to the landing page.
- Link – add a link to the company name. This link will navigate the candidate to a new page when clicked.
- Company Description – add a company description.
- Requisition Description – add a requisition description.
- Instructions – give instructions to the candidate.
- Company Logo – add a company logo to be displayed onscreen.
- Auto-Qualified Stages Settings – Select a stage to advance the candidate to upon qualification. Then add a question which will determine the candidate’s qualification.
- Document Upload – add a section to the landing page requesting a specific document for the candidate to upload.
- Attachments – add an attachment for the candidate to review.

